Dying Light 2: How to Climb the Cherry Windmill
Dying Light 2: How to Climb the Cherry Windmill ; Finding and climbing the Cherry Windmill in Dying Light 2 can be a bit of a hassle. Here's how to do this.
Dying Light 2, It's a Parkour playground filled with tons of buildings, obstacles and even enemies for Aiden to use to his advantage. But there are some Parkour sections that can be much harder to navigate than others. The windmills scattered around Villedor are a good example, and players will need to climb to the top of these imposing structures and reactivate them and turn the surrounding area into a safe zone.
A particular windmill can be quite frustrating, especially for players who start their adventure early and lack a meaningful upgrade to their Stamina. The Cherry Windmill in Dying Light 2 can be downright punishing, thanks to the opening segment that requires players to perform a series of precision jumps that will drain their Stamina meters pretty quickly. To give players an edge in beating this Parkour challenge Cherry Windmill's Here is a step-by-step overview of how to climb to the top.
Dying Light 2: How to Climb the Cherry Windmill
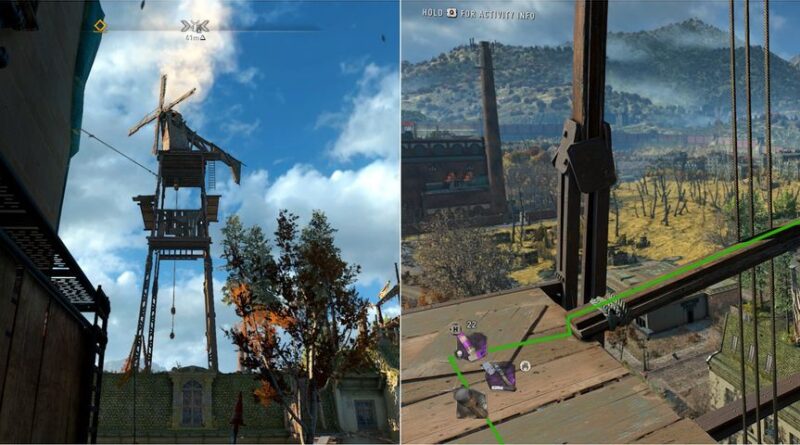
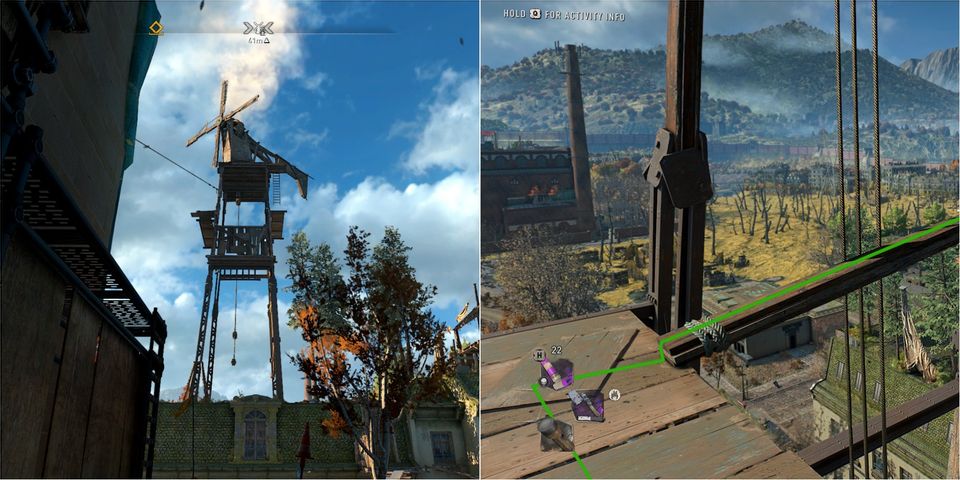
The first thing players have to do is on the map Finding Cherry Windmill. Fortunately, Houndfield is pretty easy to spot, as it's close to the intersection where Trinity and Quarry End meet. The Windmill is technically located in Houndfield and is located near a massive quarantined building (covered with a blue-green plastic shell). Once players arrive at the base of Cherry Windmill, they will have to complete a series of challenging jumps to reach the structure's first descent.
STEP ONE
It, Cherry Windmill'It's the hardest part of climbing, and it's very easy to mess up, thanks to its dedication to timing and stamina. Players are strongly advised not to try this particular windmill until they have enough Inhibitors to raise their Stamina several times. While it's possible to get to the top with an Endurance upgrade or two, it's significantly more difficult and requires much more precise timing.
To begin the walk, players must first climb the small piece of wood that protrudes from under the Windmill wall and then turn around so they can see the weight moving up and down on the bars behind them. When the weight comes under the bars, players can jump onto it and drive upward. When it reaches the peak of its movement, players can jump onto the yellow board fixed to the wall of the windmill.
From there, players have to swing along the wall until they are close enough to jump to a nearby metal beam. What makes this section so difficult is that all of these moves have to be done with a single Stamina bar. There's nowhere for Aiden to rest and regain Stamina, and it's all too easy to run out of Stamina before he makes the platform beam.
SECOND STEP
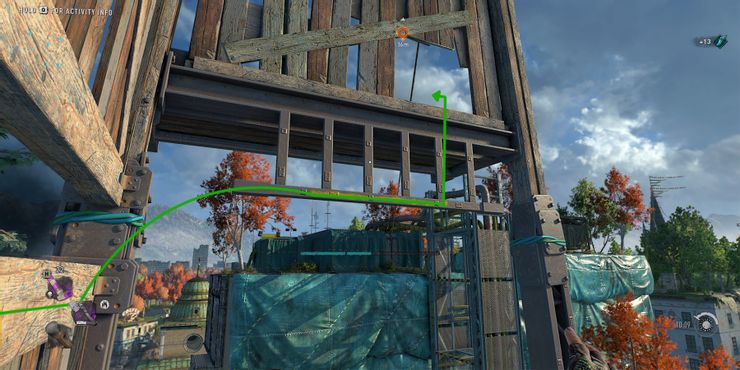
Once players have conquered the first section, the rest of the Windmill climb is a piece of cake (by comparison). When players look up from where they are standing, they will see another piece of wood protruding downwards that they can climb. Climbing this wood will lead them along a narrow beam and onto a low ladder from which they can easily jump.
After climbing the ladder, players will be able to access the Windmill's electrical panel and interact with it to get the structure back up and running. From there, players can assign it to a Faction of their choice (assuming they're that far back in the story) and continue their journey in Villedor with a new fancy Safe Zone.
For More Articles: DIRECTORY